You’ve read our Guide on Picking Longboard Parts, bought a bunch of components, and now you’re ready to put it all together! But how do you put it all together? Follow this instructional guide on how to assemble your longboard! We cover some important tips to make sure everything goes together smoothly.
Longboard Assembly: Tools Required
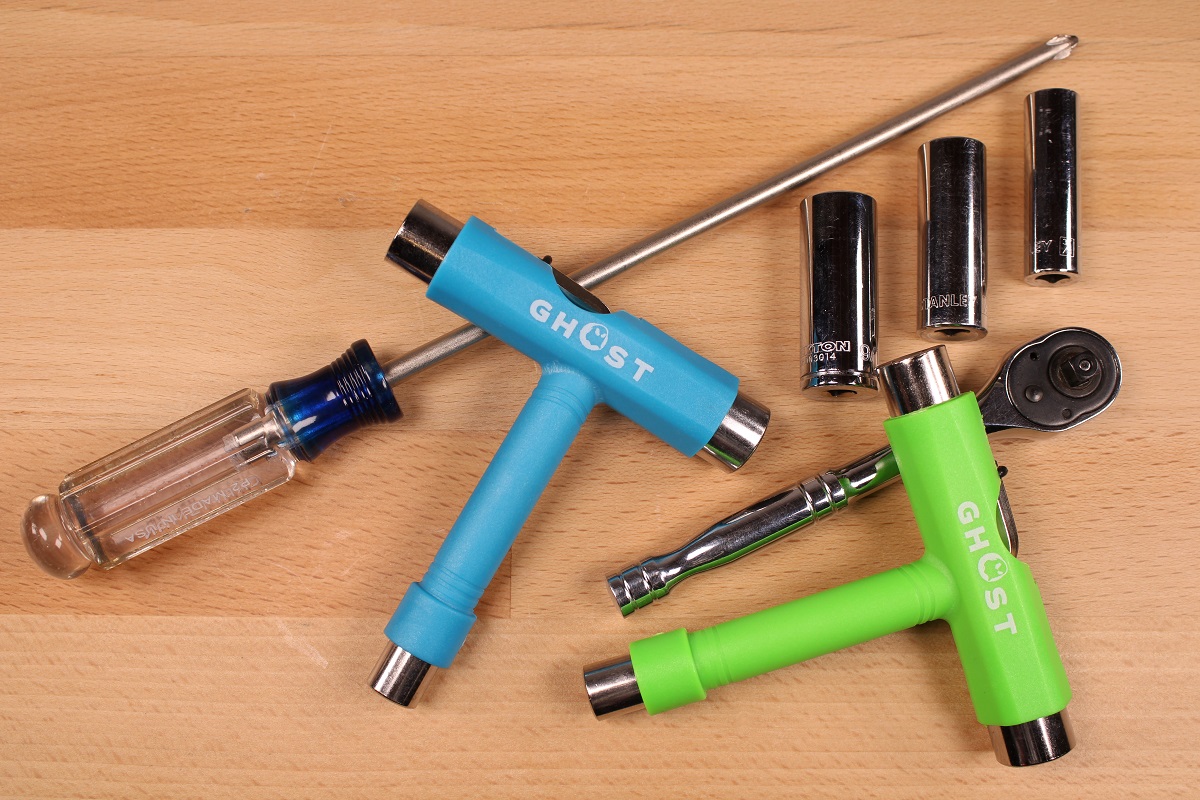
Thankfully, assembly’s a breeze and requires just a few simple hand tools. No matter the brand nor maker, virtually all longboard (and skateboard) components use the same sockets and tools.
We strongly recommend investing in a Longboard/Skate T-Tool!
The T-tool provides all the sockets you’ll need to install, swap, and maintain your trucks, wheels, and bushings. The sockets and tools required include:
- 3/8″ Socket: This is required for tightening your truck’s nylon locking nuts.
- 1/2″ Socket: This is required for tightening your wheel nuts.
- 9/16″ Socket: For adjusting the truck bushings after install.
- Ratchet Wrench: For quick n’ easy tightening, of course.
- Phillips Head Screwdriver: You’ll need this to hold the truck bolts in place, while tightening their nuts.
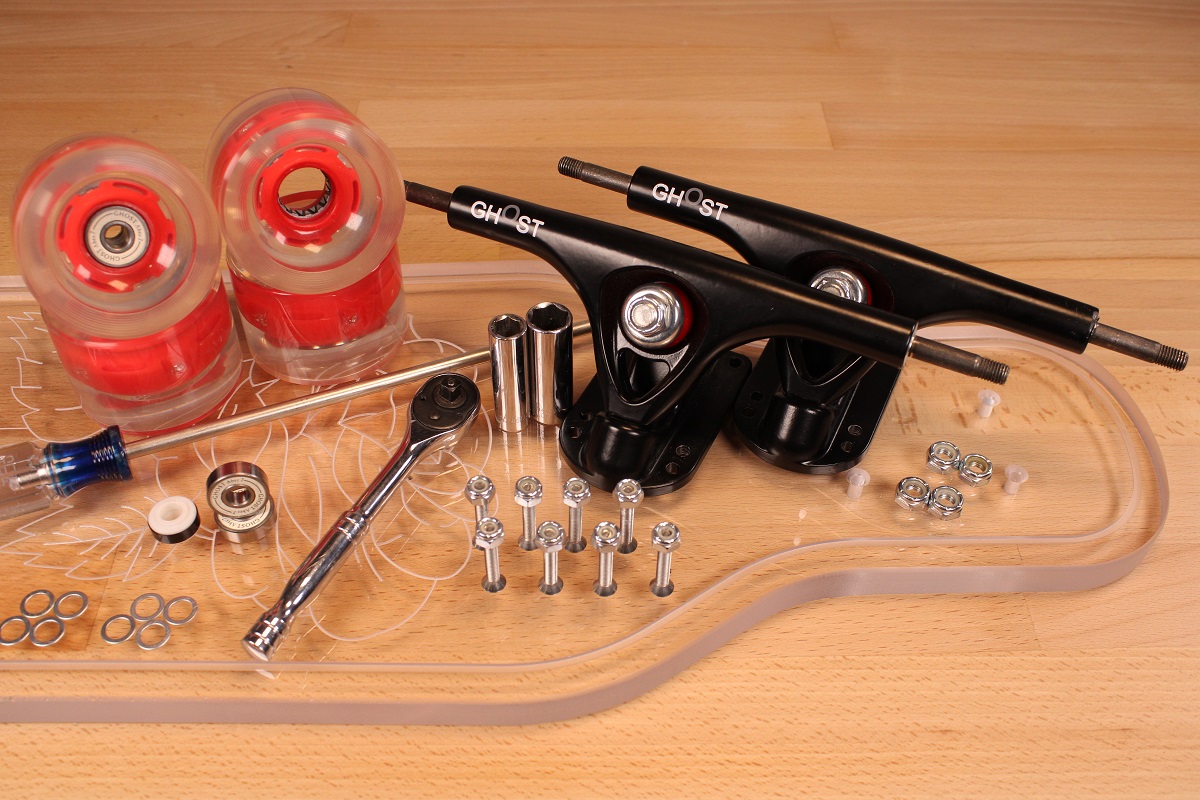
Longboard Assembly: Parts Required
Before starting, make sure you’ve got everything you need!
- Deck
- (2) Trucks
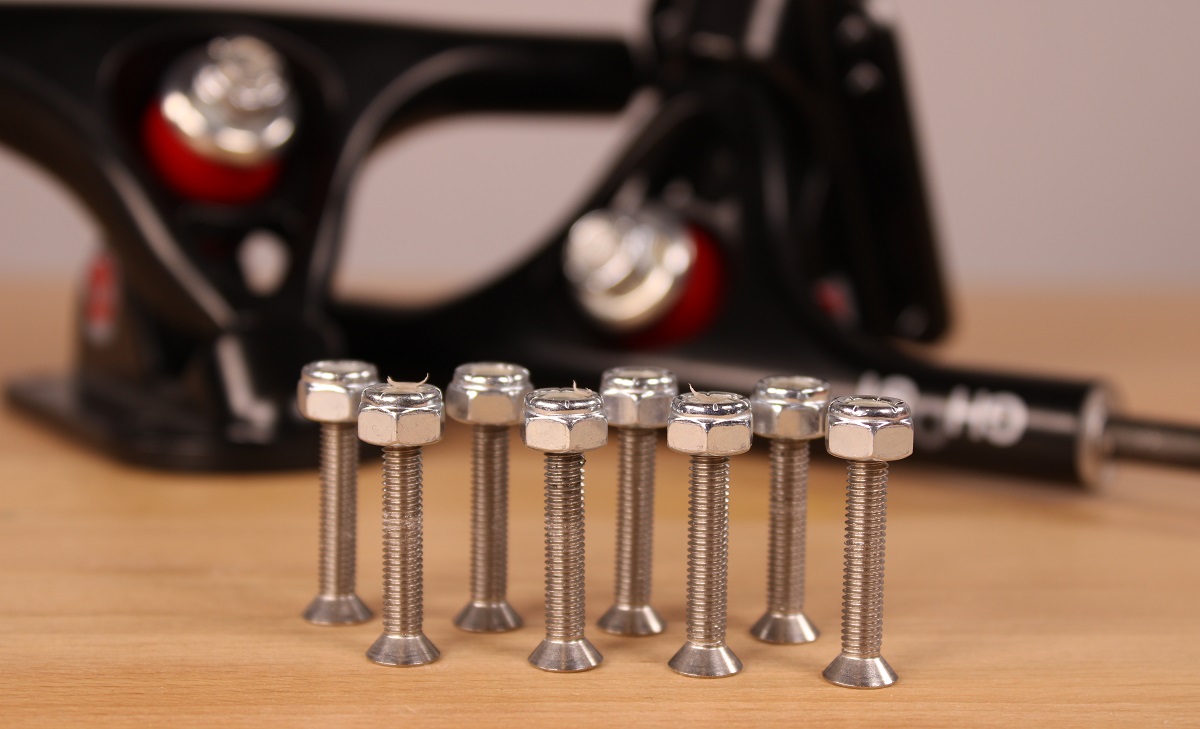
- (8) Truck Bolts
- (8) Truck Bolt Nylon Locking Nuts
- (4) Wheels
- (4) Wheel Nylon Locking Nuts
- (8) Wheel Bearings
- (8) Wheel Washers
1. Install Trucks On Deck
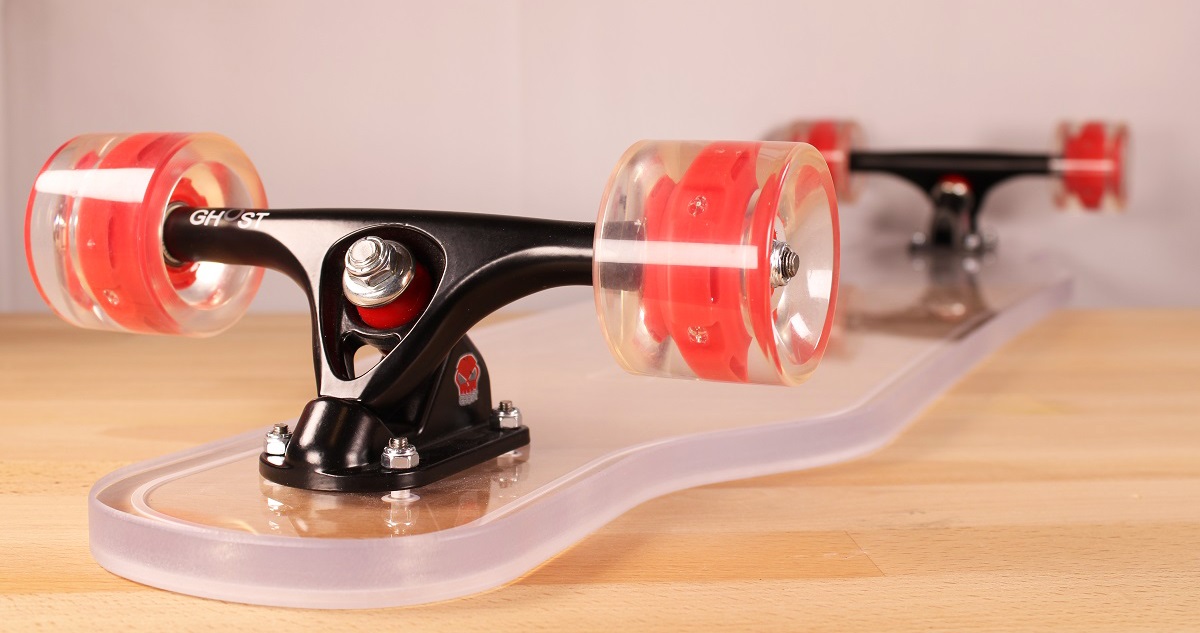
We’re installing some of our standard Black Ghost Trucks, measuring 180mm in length with a 50-degree pivot. These specs are generally considered ideal for most longboards.
![]()
We’re also using one of our clear acrylic Ghost Decks, featuring our crowd-favorite Skeleton Rose pattern. These assembly steps apply all the same for other decks, including wood, carbon fiber, and aluminum decks.
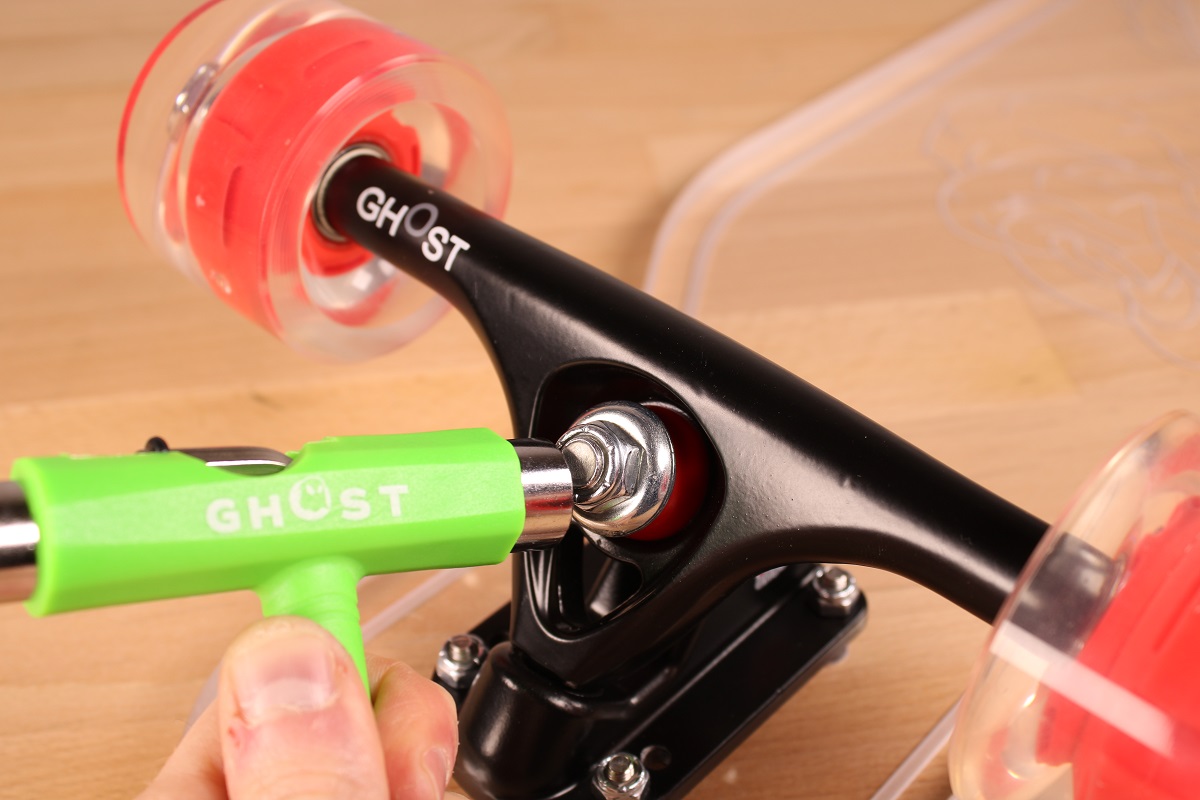
Grab both trucks, and collect all eight truck bolts and their 3/8″ nylon nuts. The bolts we’re using are countersunk, as their holes are countersunk on our Ghost Boards, to provide a flush, clean fit. NOTE: Depending on the deck and trucks you chose, you may be installing button-head bolts instead.
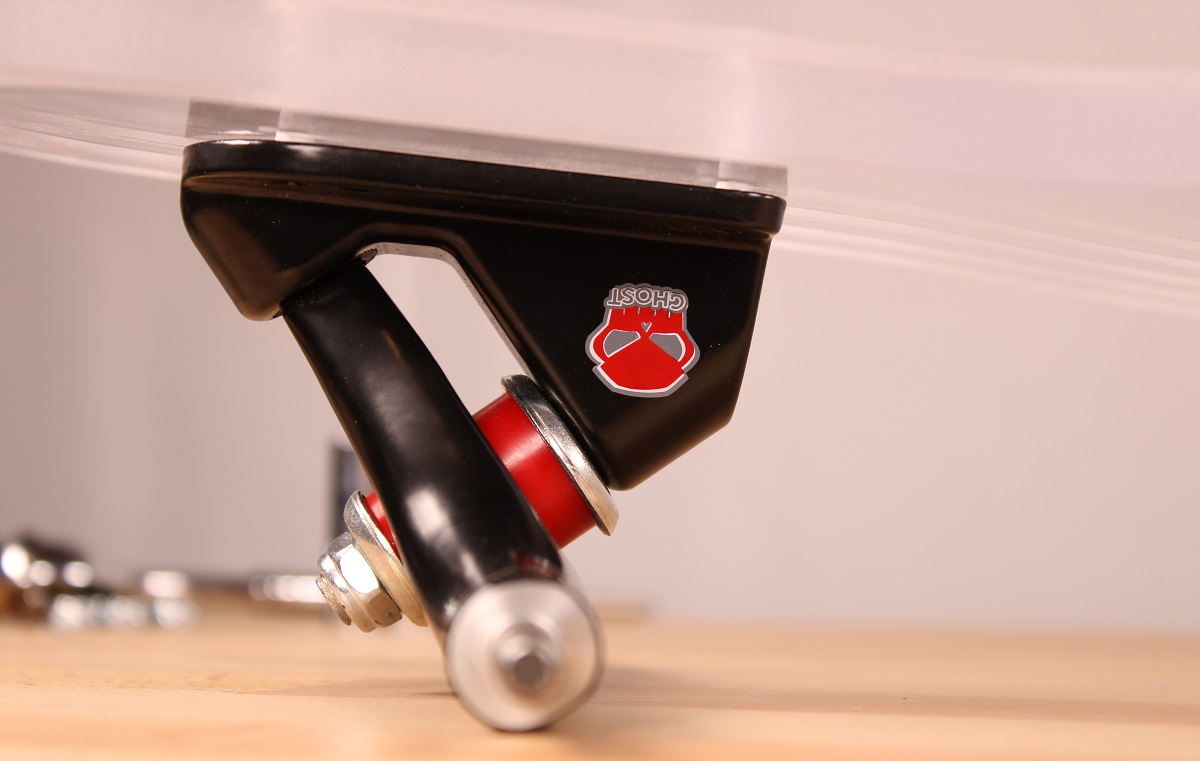
IMPORTANT: When installing your trucks on your longboard, make sure they’re pointed the right way — otherwise, you’ll have a wobbly board that doesn’t handle properly!
Longboard trucks should be oriented so their bushings point inward. The pivot point on the truck itself should point toward the front of the board, as shown above. The rear truck will point in the opposite direction, with its bushings also facing inward, and its pivot point facing the tail of the deck.
IMPORTANT: If you’re assembling a drop-through deck, the base plate for each truck will rest atop the board, instead of underneath it.
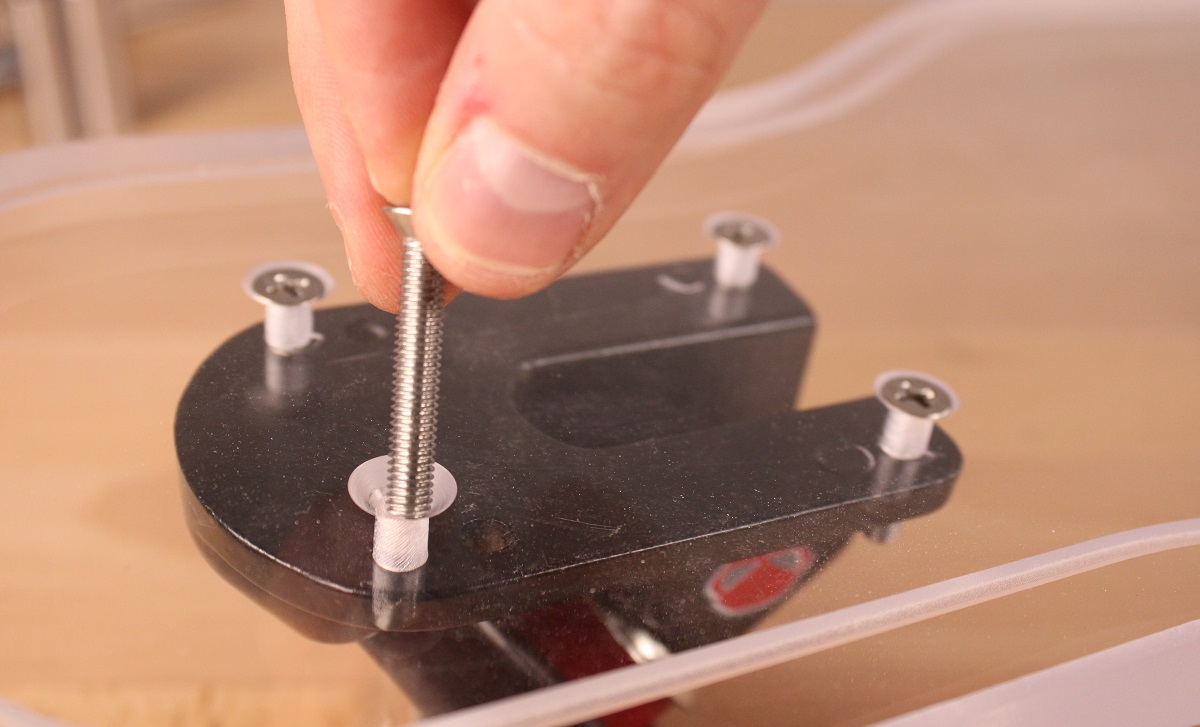
With the truck oriented correctly, align the base plate’s bolt holes with the holes drilled in the deck. Then drop each of the four truck bolts through the deck and base plate.
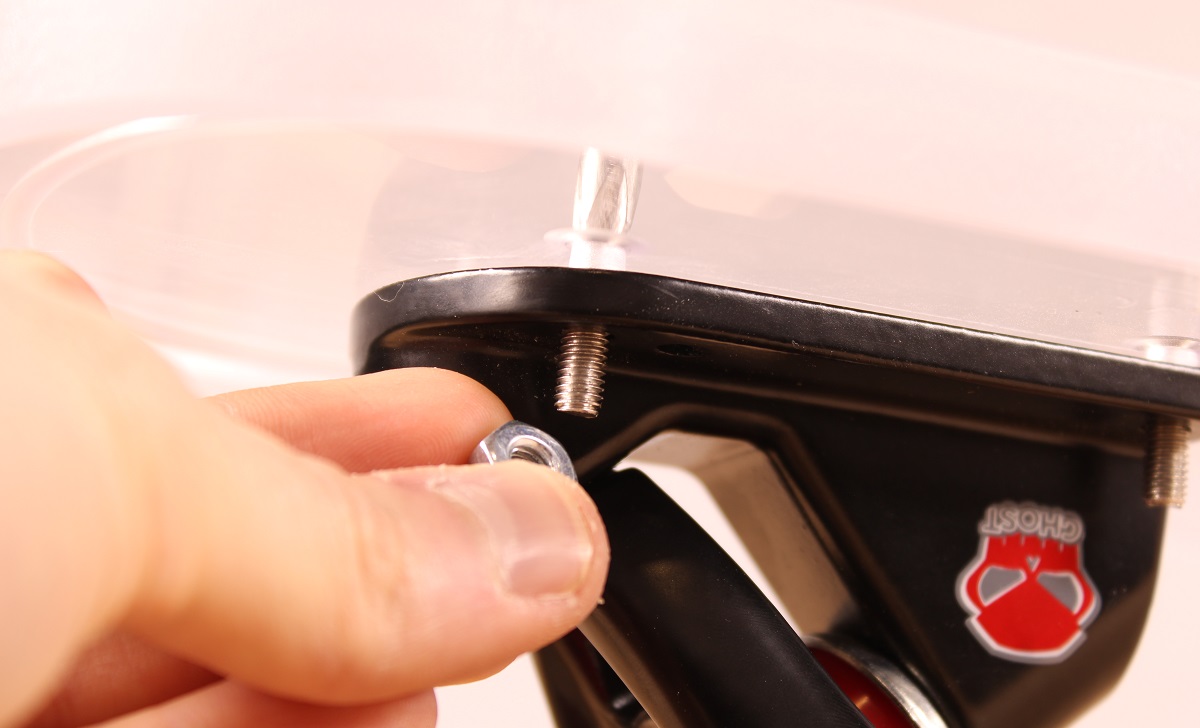
Underneath the deck, install and hand-tighten each of the four truck bolt nuts.
Now flip the board on its side. Place a Phillips Head screwdriver atop each of the truck bolts, to hold them in place. Using a 3/8″ socket, tighten each truck bolt nut.
IMPORTANT: Do not over tighten! Over tightening these fasteners can damage your deck. Nylon lock nuts don’t require high amounts of torque. Tighten until you meet resistance, then give each nut one full, final rotation with your socket. This will provide sufficient torque.
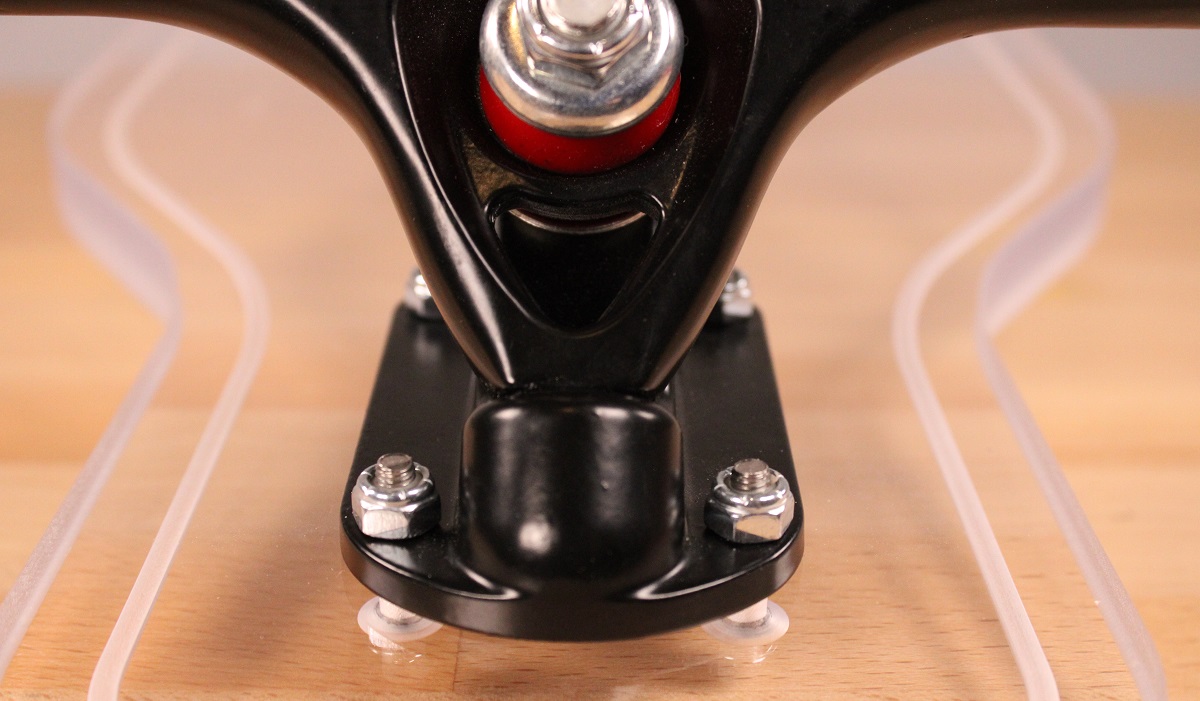
Finally, verify alignment of the truck’s base plate with the deck. Ensure the base plate is straight, front to back — otherwise, your board may tend to wander in one direction at speed.

Repeat these steps for the other truck, and then you’ll be ready to set up your wheels.
2. Install Wheel Bearings
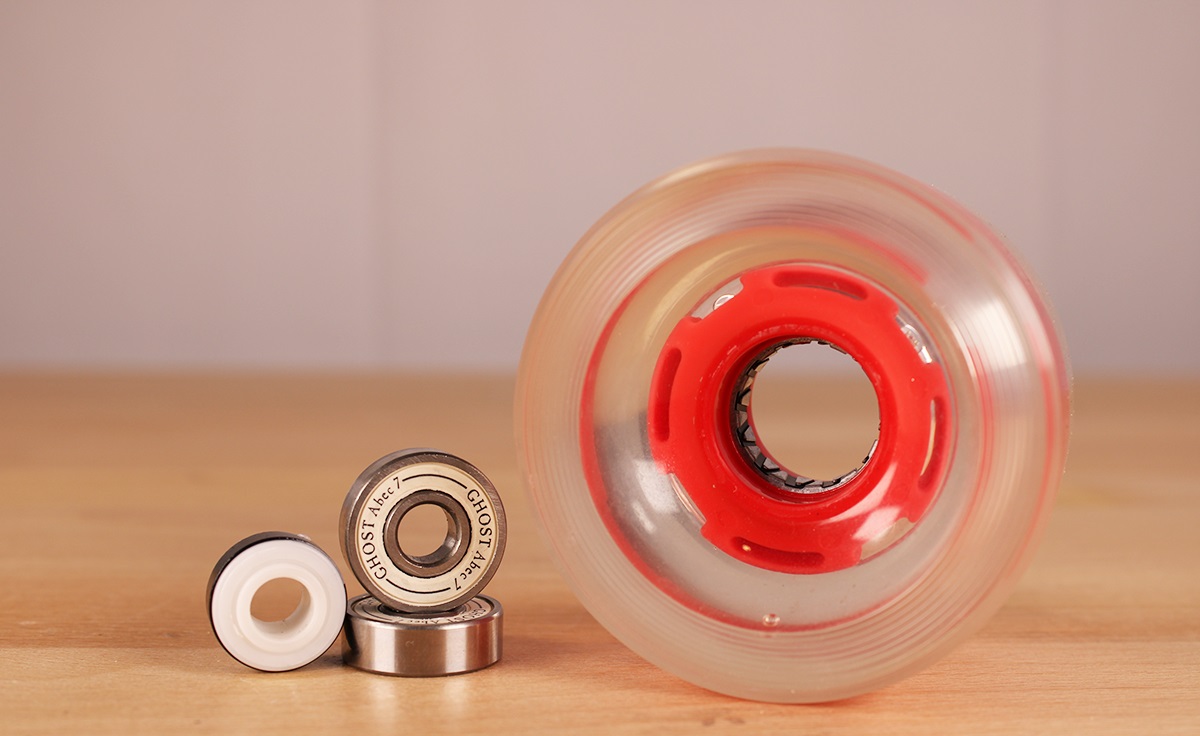
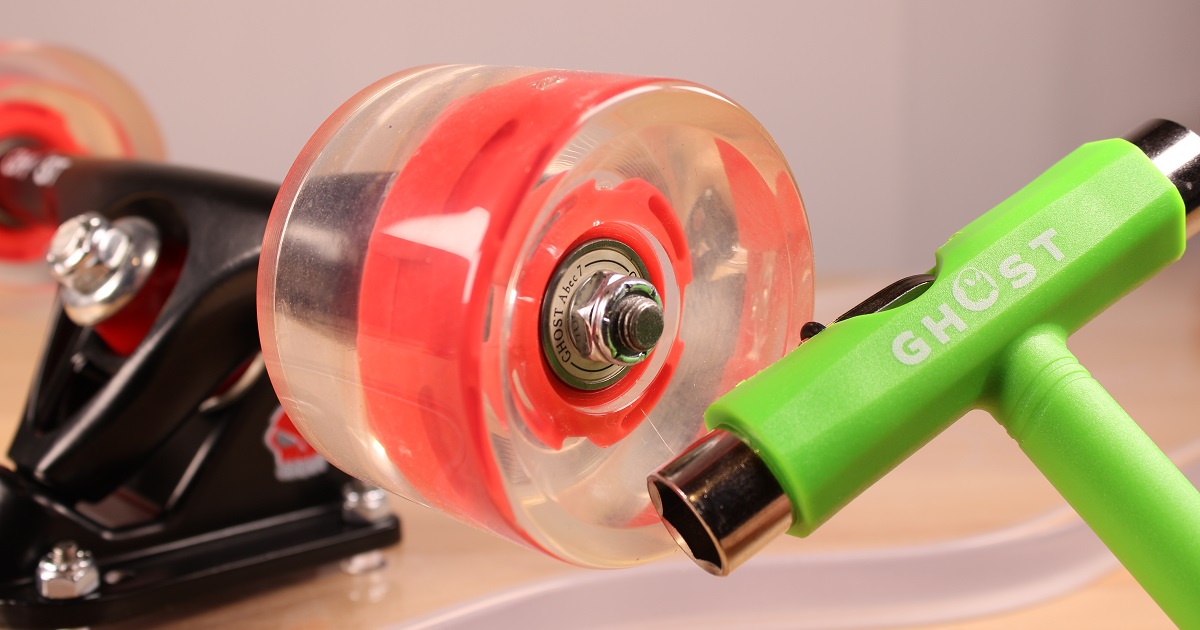
Each longboard wheel requires two bearings. We’re installing some of our red light-up Ghost Wheels. They measure 70mm in diameter, and have a hardness rating of 78a — perfect for tackling most urban terrain, with good shock absorption.
Because these wheels have wheel-driven LEDs, we’re also installing a magnet ring (more on that later).
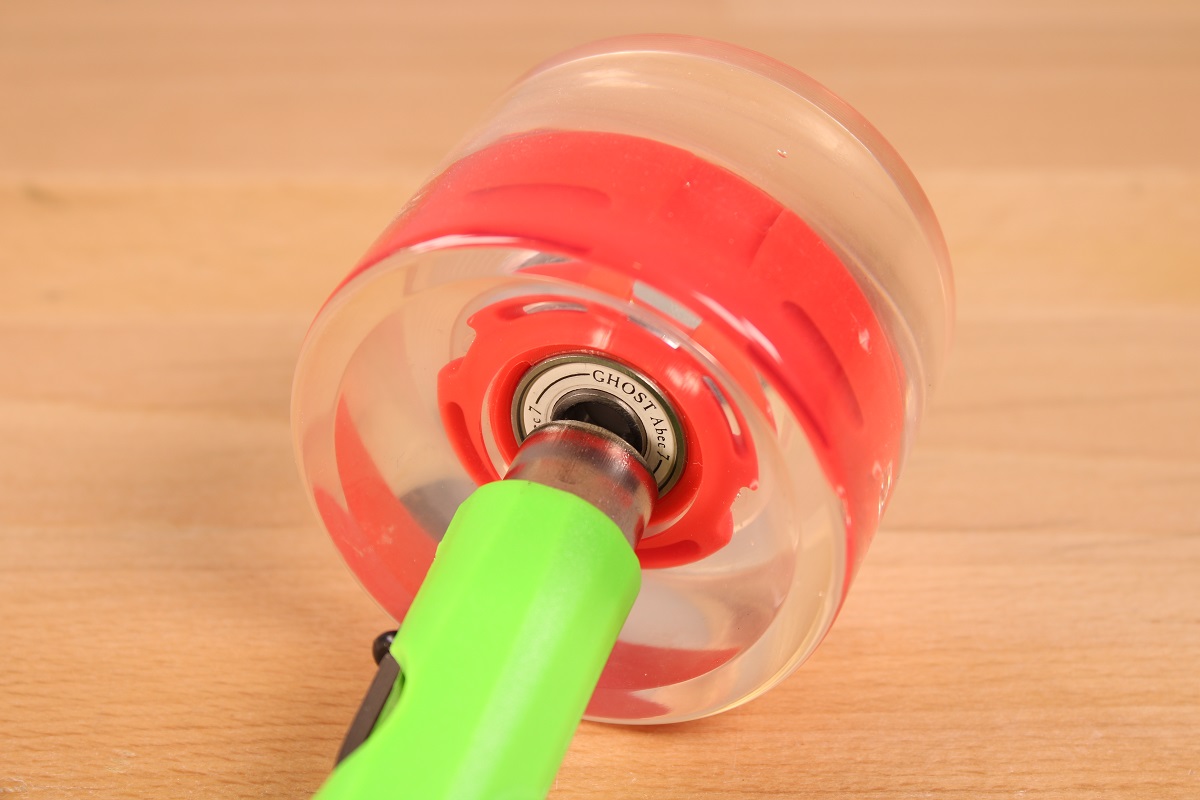
First, press one bearing into the wheel’s hub. We recommend using your T-tool for this.
IMPORTANT: When pressing bearings into the wheel, don’t press directly on the seal, or you may damage it! The 9/16″ socket on the T-tool will press against the bearing races, preventing seal damage.
We’re using sealed ABEC 7 Ghost Bearings. Your bearings may only have a seal on one side. If that’s the case, ensure the unsealed side of the bearing faces in toward the hub. This will prevent the bearings from capturing dirt and debris, and wearing out early.
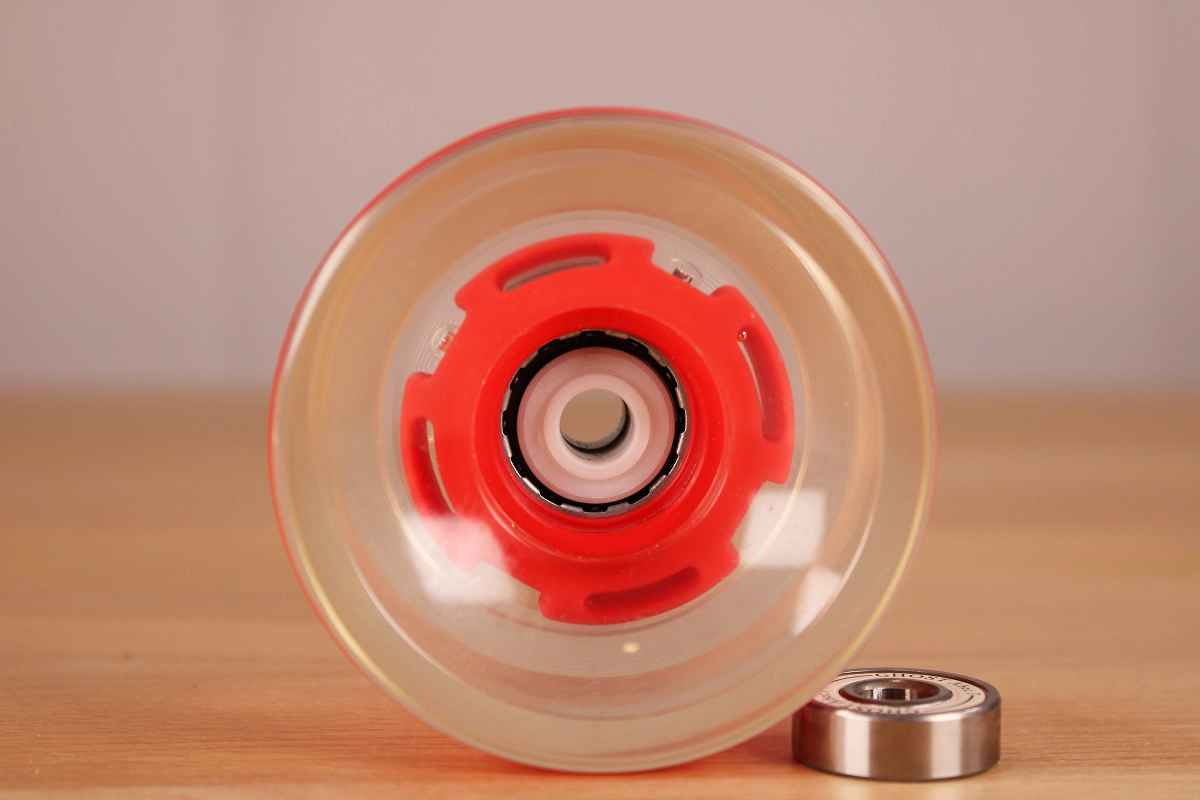
If you’re installing LED wheels, it’s time to throw the magnet ring inside the wheel hub — if you’re installing standard wheels, skip this step.
After the magnet ring is seated, press the opposite bearing into the wheel. Again, if only one side of the bearing is sealed, make sure the unsealed side faces inward.
3. Install Wheels Onto Trucks
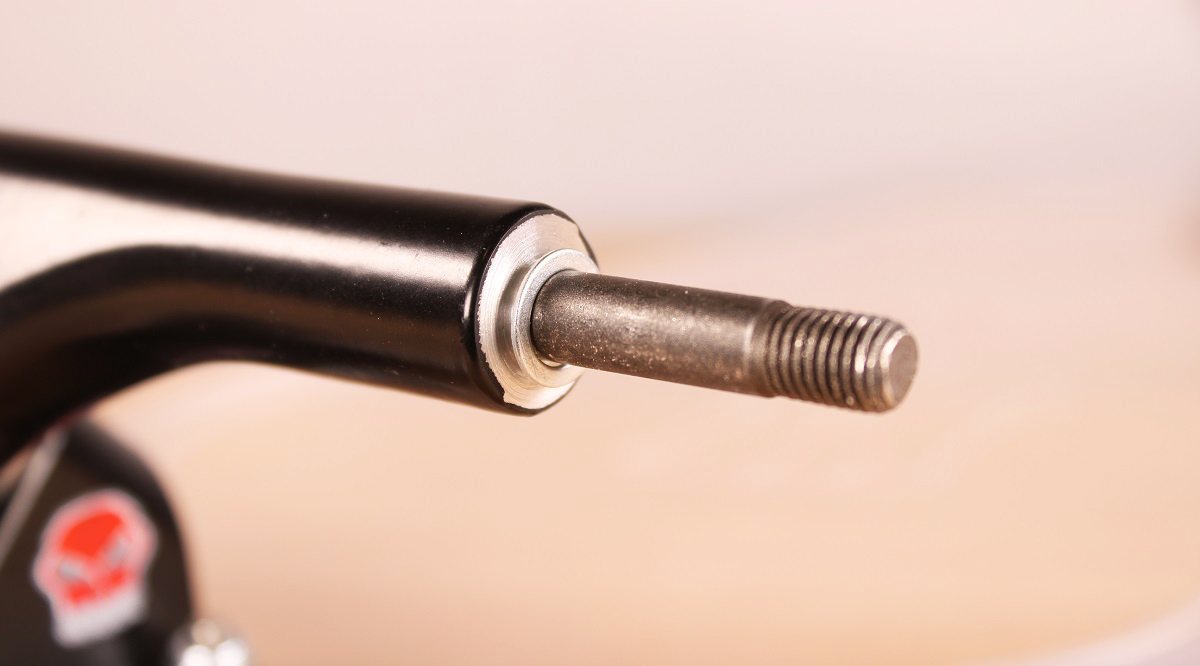
Before installing your wheels, you need to install one bearing washer on each truck shaft.
Next, install your first wheel. Note that wheels have differently shaped hubs — the deeper concave on the wheel should face inward. Once the wheel is installed on the shaft, remember to place a second washer atop the outer bearing.
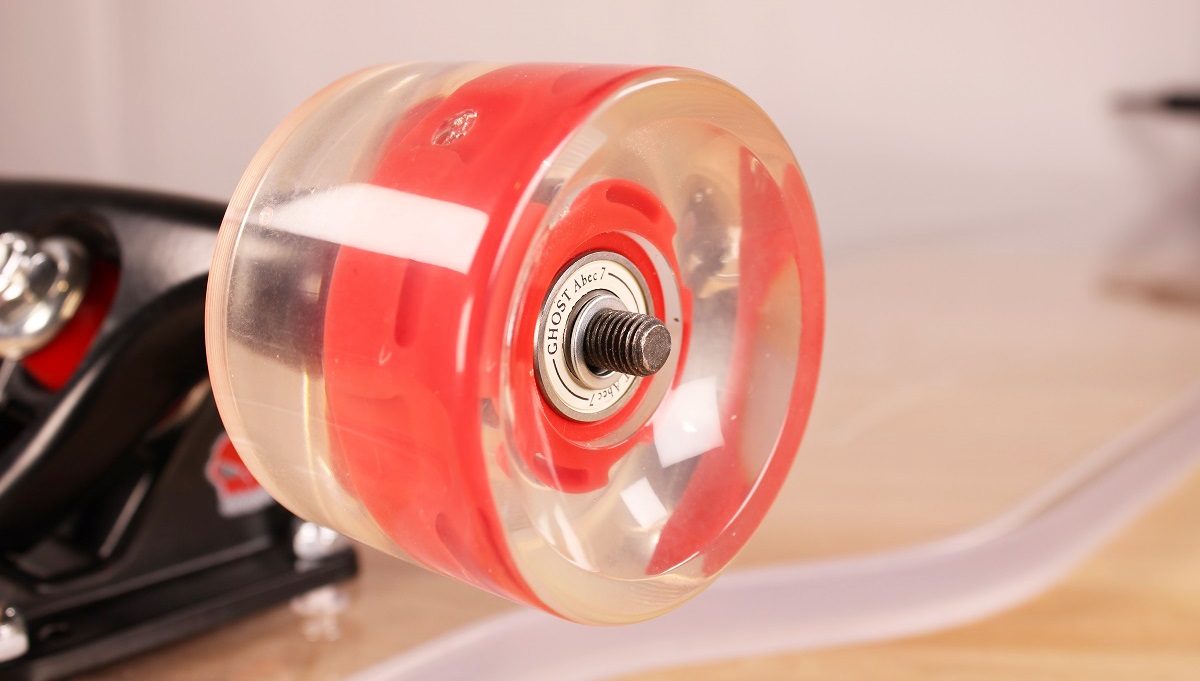
Finally, install the wheel nut. Tighten it using the 1/2″ socket on your T-tool.
IMPORTANT: Don’t over tighten! Over tightening the wheel nut wheel will cause the wheel to bind. If you’re installing light-up wheels, this can also damage the magnet ring, rendering the LEDs inoperable.
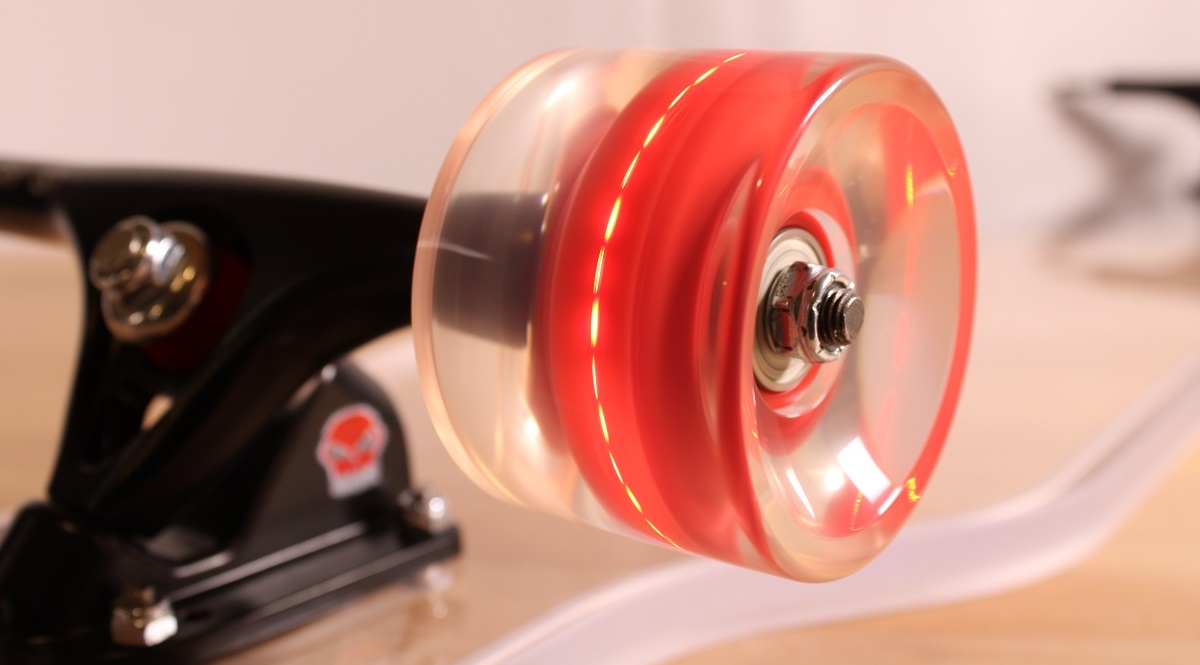
Slowly tighten each wheel nut while spinning the wheel. Tighten only until the lights inside the wheel turn on and remain on while the wheel spins. Then stop! The wheel should spin freely for at least a few seconds. If it stops spinning quickly, the nut may be too tight — loosen it slightly, ensuring the LEDs continue to light up.
Repeat the above steps for the remaining three wheels.
Your Longboard Assembly is Complete!
With all four wheels tightened, you’re ready to roll! There are some regular maintenance tasks you should perform on your board after riding a few miles — and there are specific things you should do to take care of your Ghost Board, if bought one of our acrylic decks.
Adjusting Your Trucks for Handling
Your trucks’ bushings come from the factory torqued to generally the right compression. However, you may want to play around with the bushings’ compression by loosening and tightening the kingpin nut with your 9/16″ socket on your T-tool.
Tightening the bushings will firm up the trucks, reducing wheel wobble if you experience it at high speed. Inversely, you may want to loosen the kingpin nut slightly, to loosen the bushings, to make turning at low speeds easier.
Play around with this until you find a good medium for control and stability.
Read: How to Care For & Maintain Your Longboard!
(Need Some Help With Assembly?)
Got questions about putting together your longboard? Or taking apart and reassembling your existing board? Just give us a ring! Or send us an email. We’re happy to walk you through any steps, and troubleshoot any problems or questions you might have.